AQUAvalve
Please Request a Quote
Description
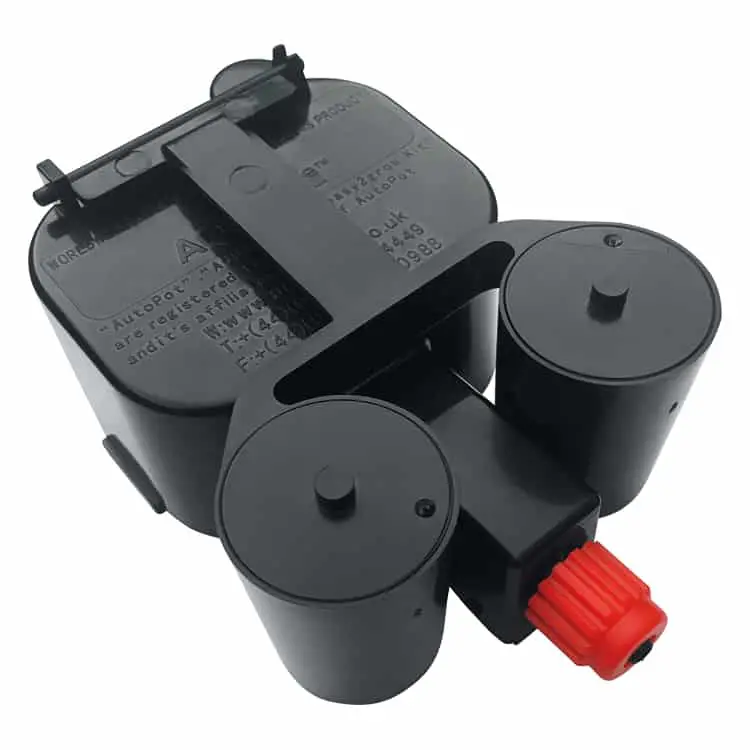
| The AQUAvalve is a simple but very effective watering device but needs to be treated with care. Keep the AQUAvalve and the tray it sits in clean, free of obstructions, soil particles and it will help you water & feed your plants for many years. The AQUAvalve is guaranteed for 12 months.
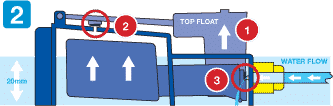
The AQUAvalve is supplied with all the AutoPot systems. Once connected to the water supply the AQUAvalve will control the flow of water to the plants, by simple gravity pressure from a tank or water barrel, no pumps, mains water pressure, electricity or timers are required. Once connected to the tank the AQUAvalve will open and allow water to fill the tray, to a pre-set level of 20mm. When the level is reached the AQUAvalve will shut off and prevent any further water from entering the tray until all the water has been consumed by the plants. |
  |
||||||||||||||||
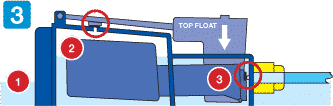
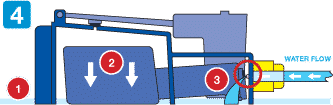
| When all the water has been consumed and the tray is empty the AQUAvalve will re-open and allow more water to enter the tray. As the plants grow larger the AQUAvalve will open and close more often and will perform in accordance with the plants needs, filling the tray and then allowing it to completely empty before it is re-filled allowing the plants to go through a wet & dry cycle. At AutoPot we call this technology PCI or “Plant Controlled Irrigation”. | |||||||||||||||||
|
|||||||||||||||||
|
|||||||||||||||||
 The AQUAvalve cover if used in conjunction with the AQUAvalve allows the grower to create their own basic but very effective hobby watering system. All that is needed is a flat tray of any shape or size. The user simply places the AQUAvalve in the tray & places the AQUAvalve cover over the top of it. A small weight of any kind needs to be placed on the AQUAvalve cover to weigh it down and the AQUAvalve beneath it, a small pot of compost or a stone will suffice.


AQUAvalve Downloads
Related products
-

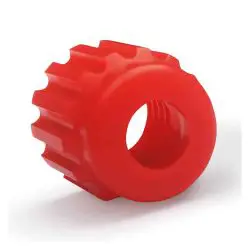
AQUAvalve collar
Please Request a QuoteProduct Added to Quote Successfully.Add To Quote Cart
View Quote -
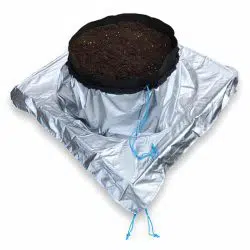
PlantSkirt
Please Request a QuoteProduct Added to Quote Successfully.Add To Quote Cart
View Quote -

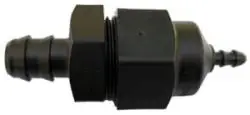
16mm-6mm In-line filter
Please Request a QuoteProduct Added to Quote Successfully.Add To Quote Cart
View Quote -

6mm Golf Filter Complete
Please Request a QuoteProduct Added to Quote Successfully.Add To Quote Cart
View Quote

Reviews
There are no reviews yet.